PRO Elementor is a free WordPress plugin that enables PRO features in the Elementor page builder, such as widgets, theme builder, dynamic colors and content, forms and popup builder, and more. It is a derivative work from the Elementor Pro WordPress plugin by Elementor Ltd, and it is licensed under the GNU General Public License, version 3 (GPLv3). It also provides automatic updates and 150+ free template kits. You can download it here for free.
How to enable PRO features of Elementor for free
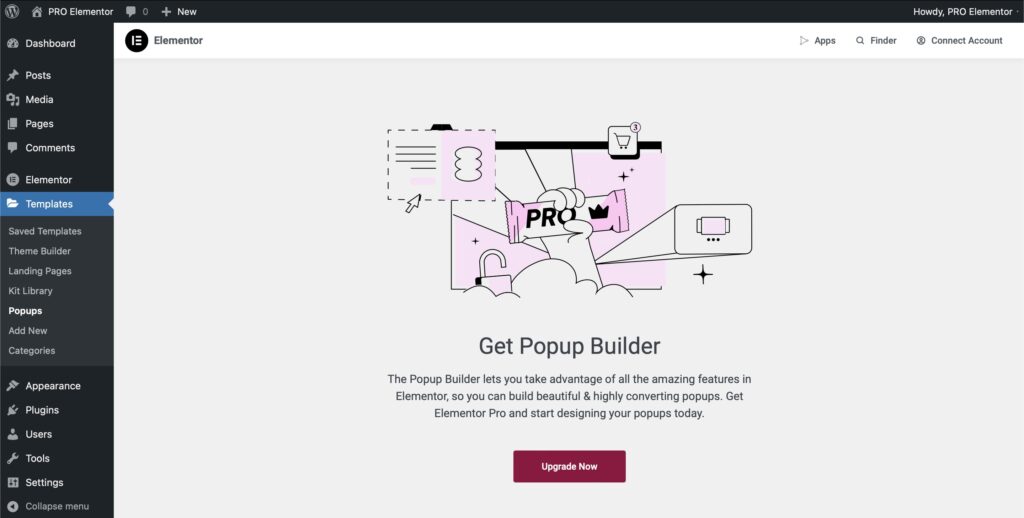
The Popup Builder lets you take advantage of all the amazing features in Elementor, so you can build beautiful and highly converted popups. Unfortunately, you need to pay for Elementor Pro to use it.
But now you just need to install the PRO Elementor plugin and activate it, and then you’ll get all the pro features such as widgets, theme builder, dynamic colors and content, forms and popup builder, and more.
• Download the pro-elementor.zip file from your order history page. If you don’t have an account, just sign up here.
• From your WordPress dashboard, choose Plugins > Add New.
• Click Upload Plugin at the top of the page.
• Click Choose File, locate the plugin pro-elementor.zip file, then click Install Now.
• After the installation is complete, click Activate Plugin.
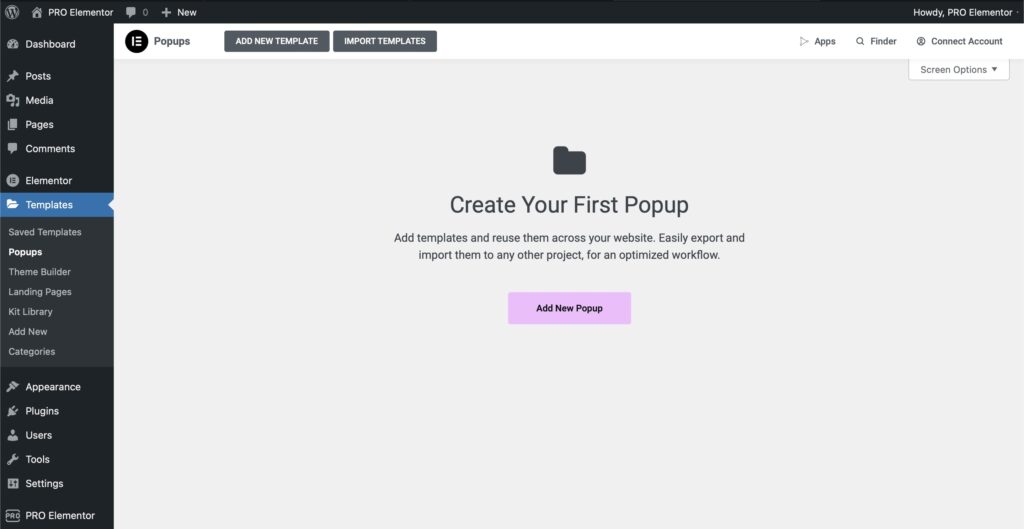
Now create your first popup and enjoy the full power of Elementor.
How to Install or Import an Elementor Template Kit
An Elementor template kit is a bundle of templates, pages, popups, and other elements that you can use to build your website with Elementor. To import an Elementor template kit, you need to follow these steps.
Most template kits are built and tested with Hello Theme, a lightweight and minimalist WordPress theme that works well with the Elementor site builder plugin. Therefore, it makes sense to start by installing and activating the theme and the plugin.
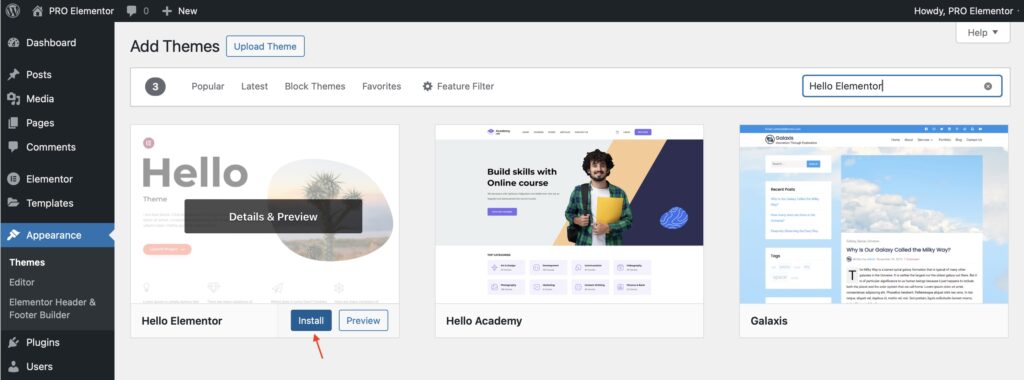
- In your WordPress dashboard, go to Appearance > Themes and click Add New.
- Search for Hello Elementor in the search bar. It should appear as the first result.
- Click Install, then Activate.
There are different ways to install or import Elementor template kits, but the easiest one is to use our free plugin PRO Elementor. We recommend using our PRO Elementor plugin to import and manage template kits, which enables one-click import of template kits online without downloading and re-uploading. It’s ready to be customized exactly as you want.
Before you import template kits, you need to install and activate the PRO Elementor plugin first. Once PRO Elementor is activated, you’ll have full access to all free and premium Template Kits.
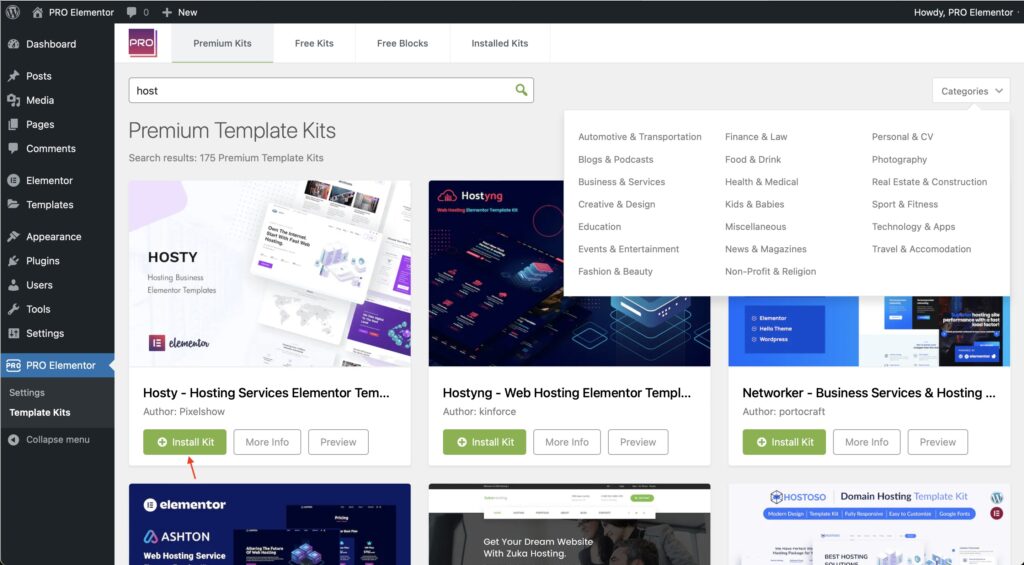
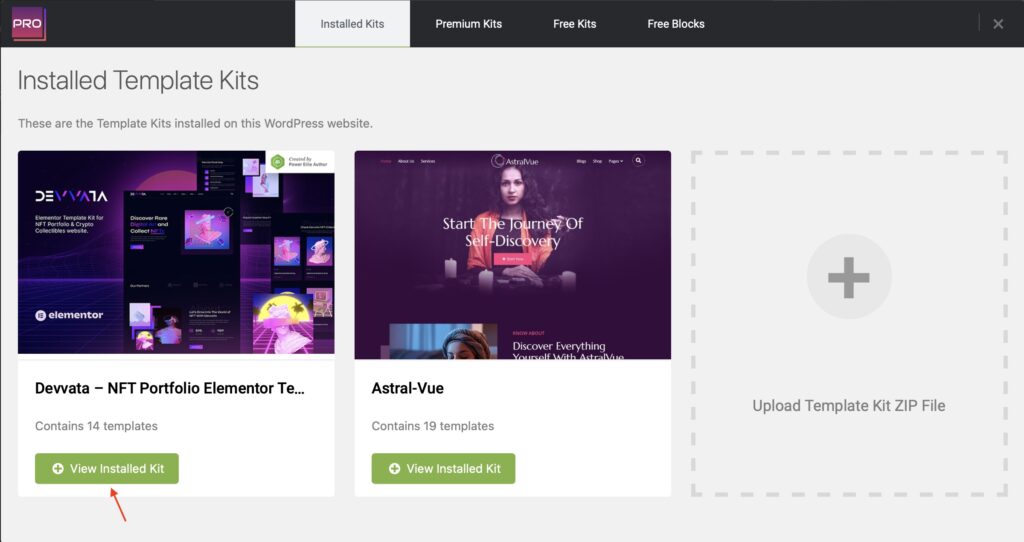
Search for a kit by keyword or name, use the category filter, or browse through until you find something you like! To install a template kit, simply click the Install Kit button under the cover image.
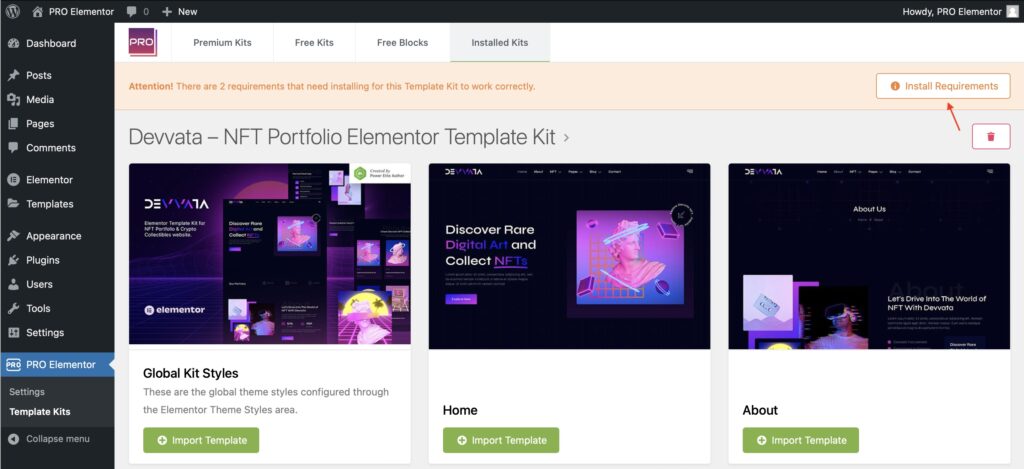
When you click View Kit, you’ll see all the available pages and components. An orange banner will appear if your template kit requires additional plugins. Click Install Requirements for details.
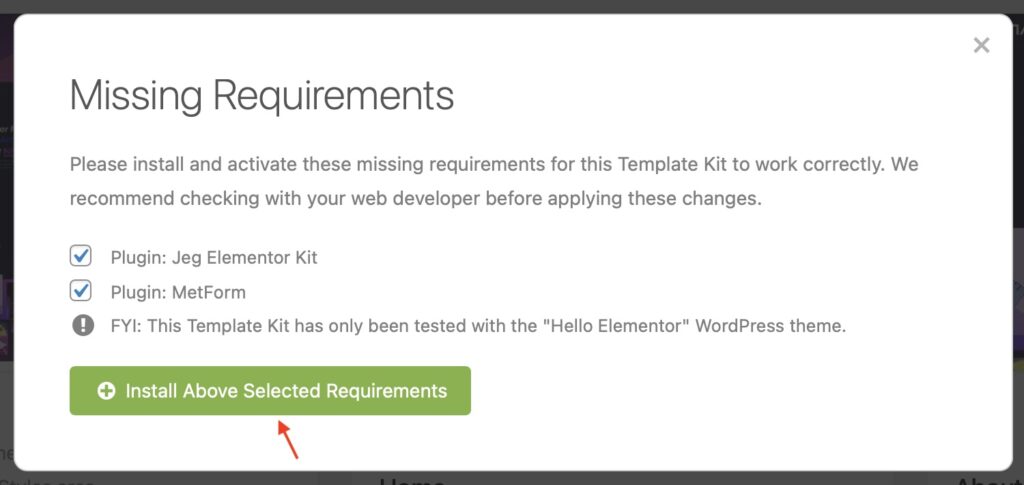
A pop-up will appear listing the plugins your template kit needs installed or activated. Click Install Requirements to proceed.
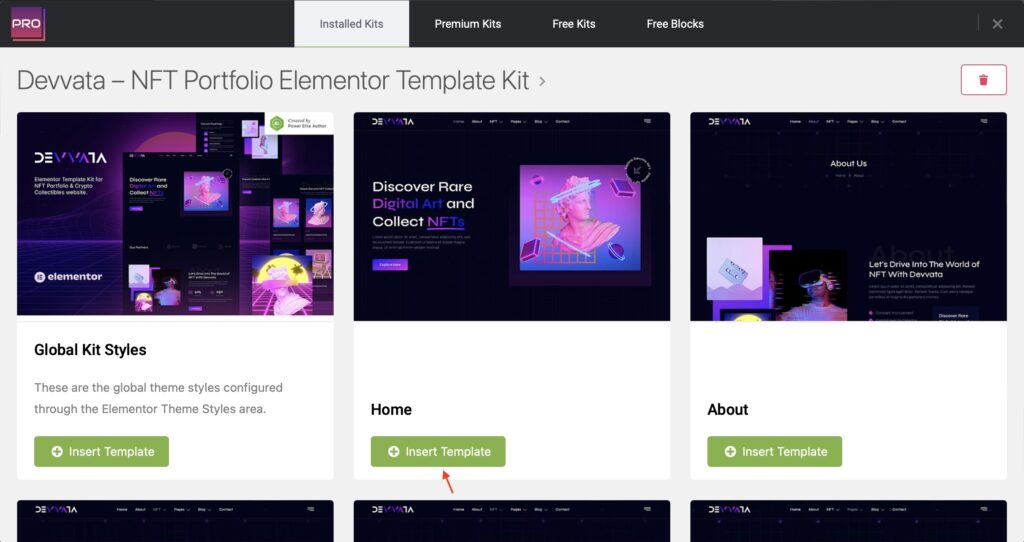
Begin by clicking Import on the Global Kit Styles first to import the font and colors. Skip this if you want to use an existing style or your theme’s styles.
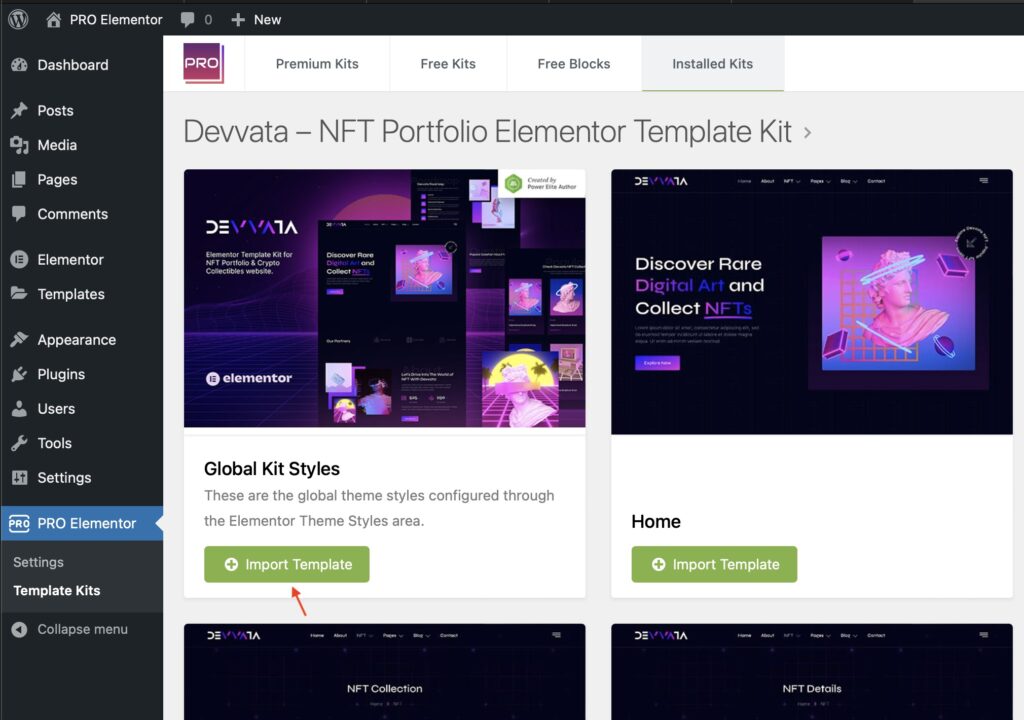
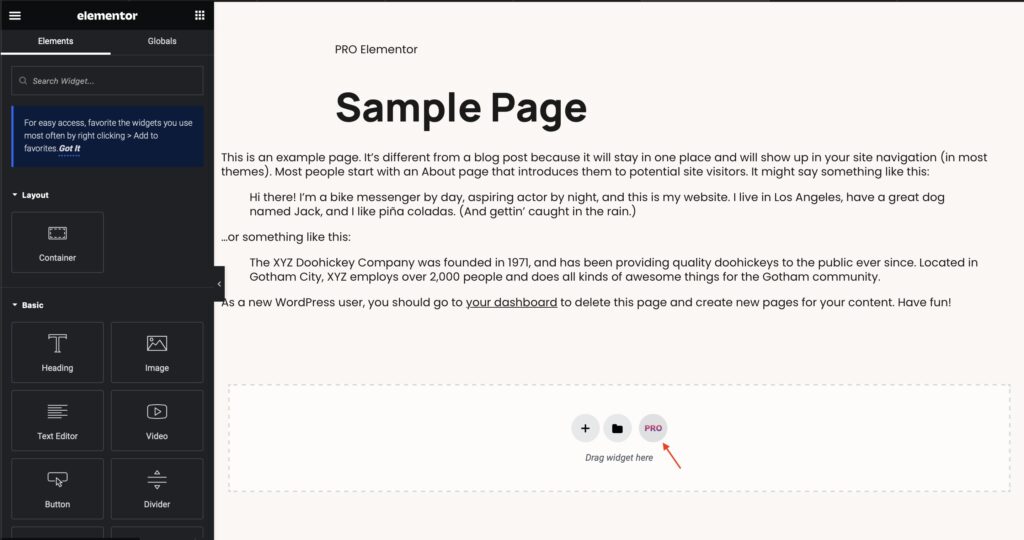
Now you may begin importing your templates by clicking the Import Template button on the desired template. You can do this here or go to the page where you want to install the template and import it there.
How to Import MetForm from The Template Kit
In order for the users of template kits to get as many professional forms as possible for their sites, a free but very powerful version of the MetForm plugin was used to create the forms. For this reason, in order for these templates to be properly implemented on the sites, it is necessary to follow a special procedure separately for each of the forms that appear on the site.
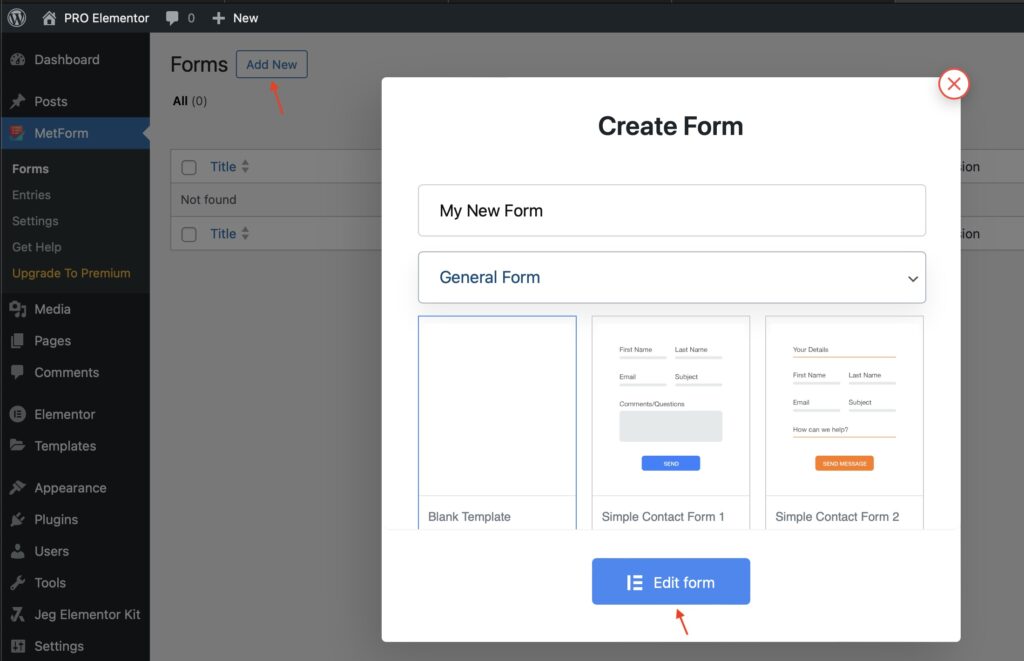
First, you need to create a new MetForm, give it a name, and import the appropriate template that you got in the Template Kit: Select WP Dashboard > MetForm > Forms > Add New. Name your new form (e.g., My New Form), then scroll to the bottom of the pop-up window and select the Edit form option.
Select the Add template option (in the gray circle). From My Templates, select the desired MetForm template and click Insert. When the template is loaded into a new form, click the Update & Close button.
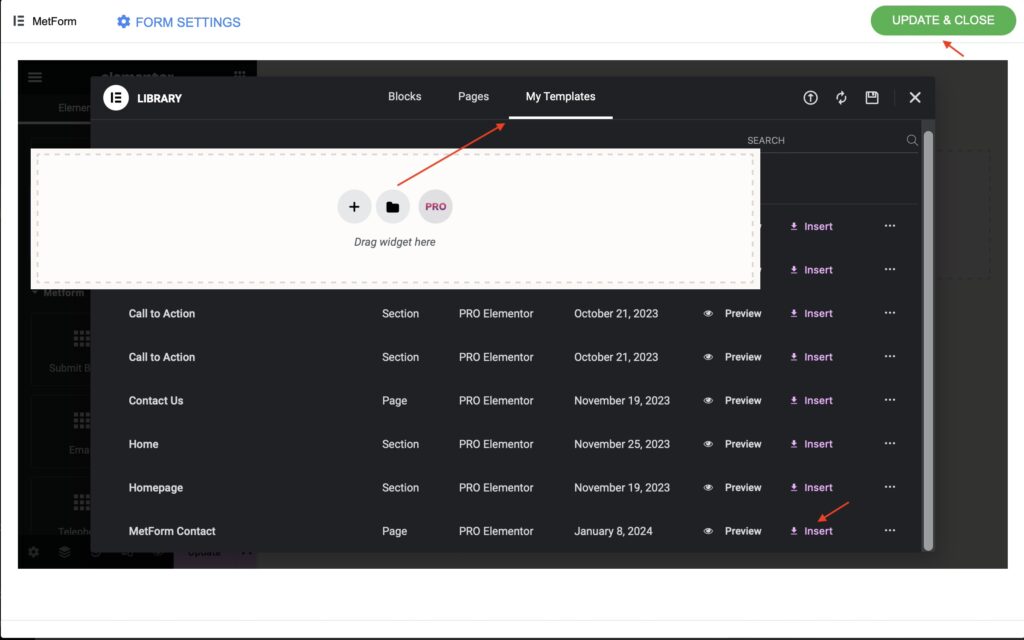
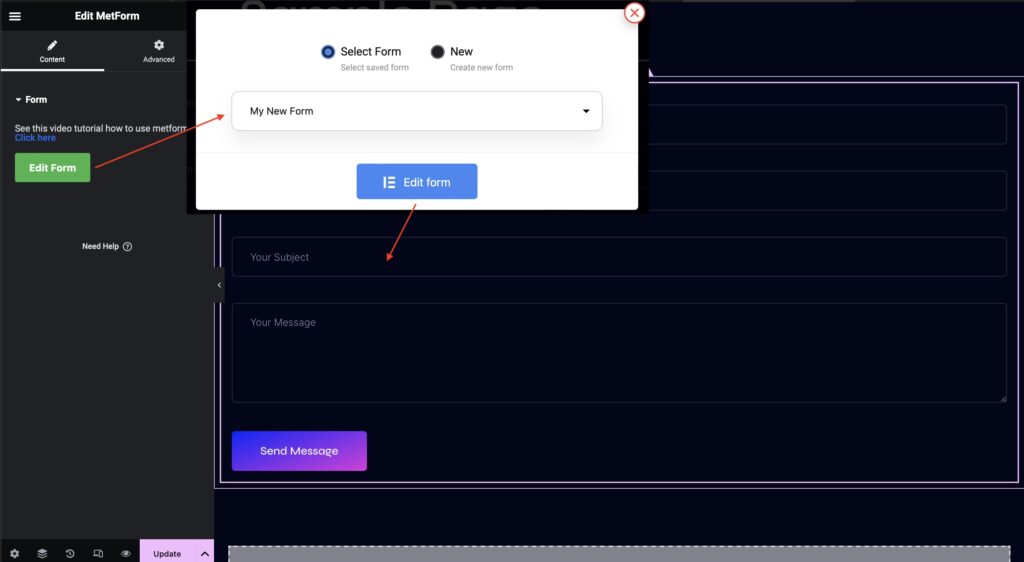
Open the page where the form should be, which you have already created. Find and activate the MetForm widget. On the sidebar, click Edit MetForm > Content > Edit Form. A pop-up window will appear. Select Select Form > The Title You Created Earlier > Edit Form. When the form is loaded, click on the green button in the upper-right corner under Update & Close.
